> For the complete documentation index, see [llms.txt](https://integrations.drivetrain.ai/llms.txt). Markdown versions of documentation pages are available by appending `.md` to page URLs; this page is available as [Markdown](https://integrations.drivetrain.ai/integration-guide/integrate-with-drivetrain/others/integrating-with-netsuite-role-based-access.md).
# Integrating with NetSuite (Role Based Access)
[Prerequisites](#prerequisites)
[NetSuite Setup](#netsuite-setup)\
[Step 1: Create a New Role](#step-1-create-a-new-role)\
[Step 2: Assign Relevant Permissions](#step-2-assign-relevant-permissions)\
[Step 3: Create a User and assign the above Role to that User](#step-3-create-a-user-and-assign-the-above-role-to-that-user)\
[Step 4: Create an Integration](#step-4-create-an-integration)\
[Step 5: Generate the Token Key and Token Secret](#step-5-generate-the-token-key-and-token-secret)\
[Step 6: Get Account ID](#step-6-get-account-id)\
[Step 7: Set up NetSuite Saved Search](#step-7-set-up-netsuite-saved-search)
[Drivetrain Setup](#step-7-set-up-netsuite-saved-search)\
[Step 1: Navigating to the NetSuite connector](#step-1-navigating-to-the-netsuite-connector)\
[Step 2: Entering Credentials](#step-2-entering-credentials)
### Prerequisites
To connect NetSuite to Drivetrain, you need:
* An active Oracle NetSuite account
* Allowed access to all Account permissions options on the Netsuite account
* Admin privileges in Drivetrain
### NetSuite Setup
{% hint style="info" %}
To integrate NetSuite with Drivetrain, please share the below information with your Drivetrain customer success manager:
* Username and password of NetSuite account with frontend access
* Consumer key and secret of the integration account
* Account ID of the integration account
* Token key and secret of the integration guide
* Script ID and deploy ID after deploying the saved search script
Follow the steps below to get this information.
{% endhint %}
#### **Step 1: Create a New Role**
* Sign in to your NetSuite instance. Make sure you are logged in as an Administrator.
* From the menu bar, navigate to **Setup** > **User/Roles** > **Manage Roles** > **New.**

* In the Role page, fill in a name for the Role, ensure that *Accounting Center* is selected as '**CENTER TYPE'** and click **Save.**
{% hint style="info" %}
*The "Name" field is a field for your reference. We recommend using "DrivetrainIntegrationRole"*
{% endhint %}

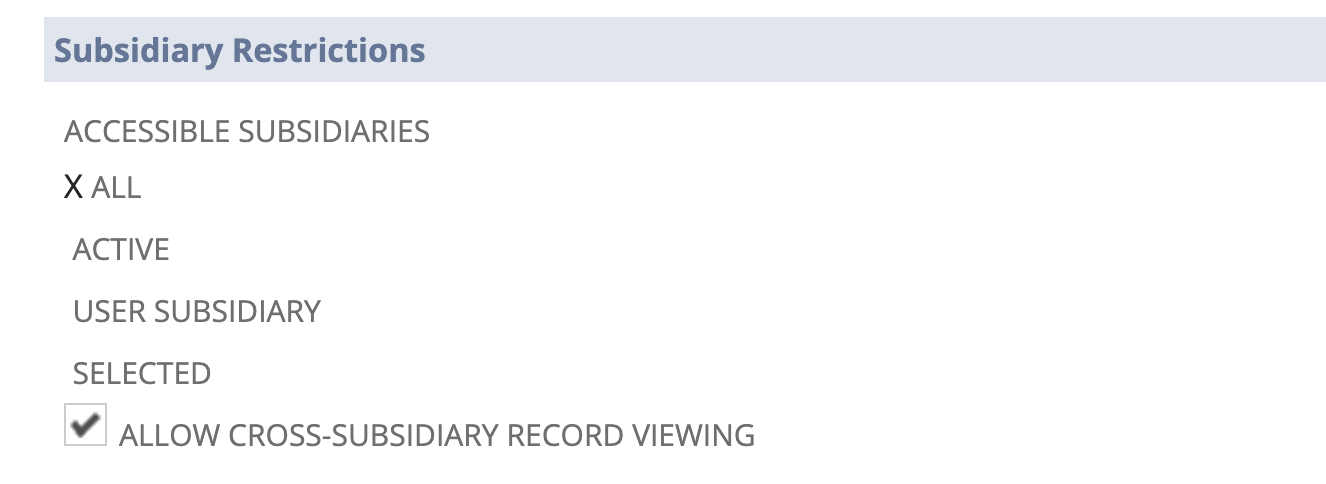
* In case you have subsidiaries enabled, please select '**ALL'** subsidiaries and '**ALLOW CROSS SUBSIDIARY RECORD VIEWING'.**
* Please select **ALL** Accounting Books.
#### Step 2: Assign Relevant Permissions
* Now you'll add permissions for the Role as per the **List of Permissions with Levels** given below. The exact list may vary depending on the fields required for metric calculations specific to your use cases.
* Transactions and Lists fields require 'View' permission.
* Reports fields require 'View' permission. However, Report Customization requires 'Full' access.
* Setup fields requires 'Full' access.
{% embed url="" %}
{% hint style="danger" %}
Note: Permission **Rest Web Services** is mandatory. In case you do not find it under Setup, please follow the steps below to enable them first.
{% endhint %}
Enable the feature at Setup > Company > Setup Tasks > Enable Features, in the SuiteTalk (Web Services) section, on the SuiteCloud subtab.
#### **Step 3: Create a User and assign the above Role to that User**
* From the menu bar, navigate to **Lists** > **Employees** > **Employees** > **New.**

* Enter your name and the email address provided to you by your customer success manager.
* Click the **Access** subtab.
* Check **Give Access** and **Send Notification Email.**
* Assign a password of your choice.
* Select the Role you created in Step 1 and click **Add.**
* Click on **Save.**
#### **Step 4: Create an Integration**
* From the menu bar, navigate to **Setup** → **Integration** → **Manage** **Integrations** → **New.**

* On the Integration page,
* Fill in the **Name** field. We recommend using "DrivetrainIntegration".
* In the Token-based Authentication section, check **TOKEN-BASED AUTHENTICATION** and uncheck **TBA: AUTHORIZATION FLOW.**
* In the **OAuth 2.0** section, uncheck **AUTHORIZATION CODE GRANT.**
* Click on **Save.**
After you've saved the settings above, scroll down to the bottom of the page to get:
* **Consumer Secret**
* **Consumer Key**
{% hint style="info" %}
Please make note of these items, as they will be required later.
{% endhint %}
#### Step 5: Generate the Token Key and Token Secret
* Log into NetSuite with the user account you set up in Step 2.
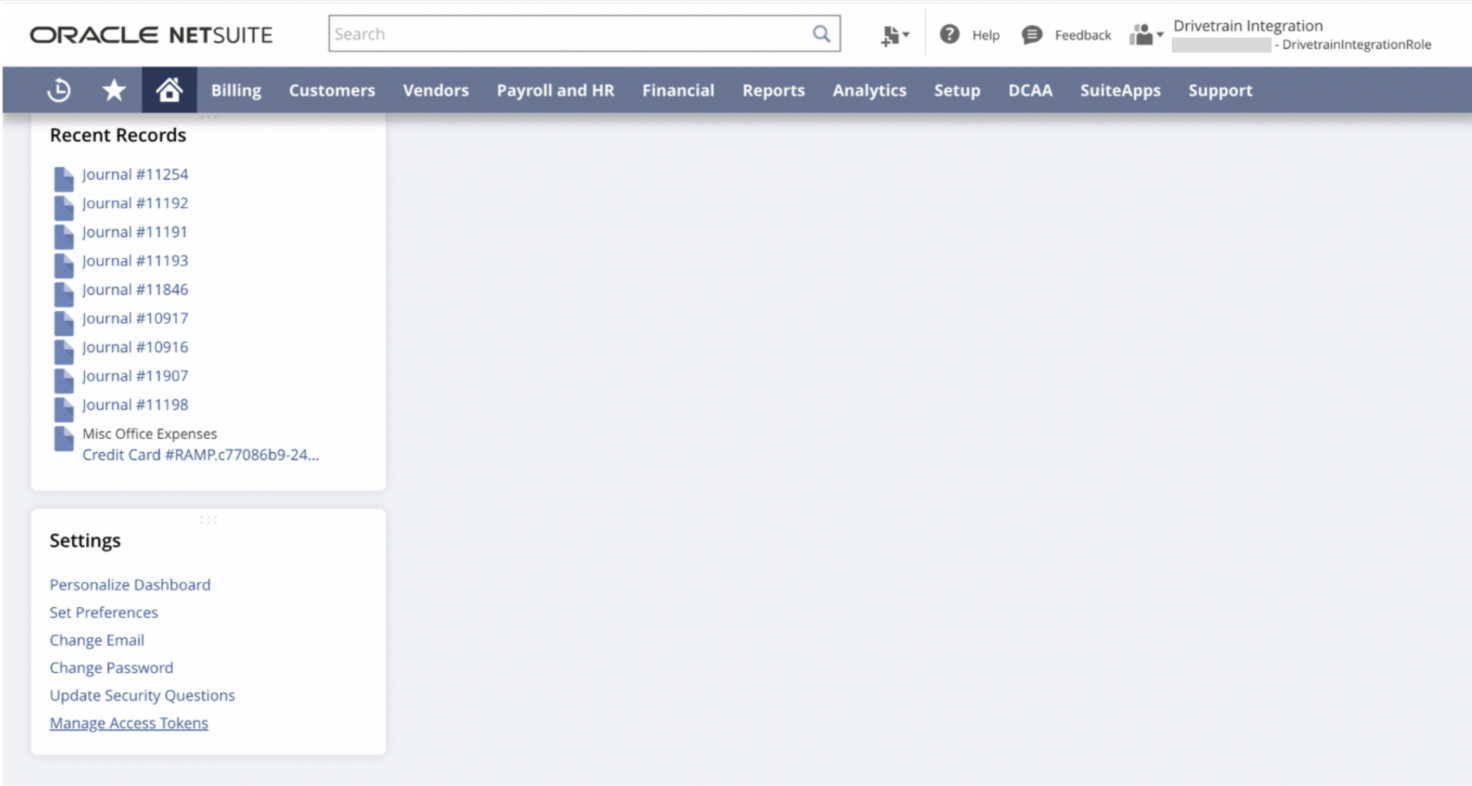
* Click the **Home** icon.
* Scroll to the bottom.
* Click **Manage Access Tokens.**
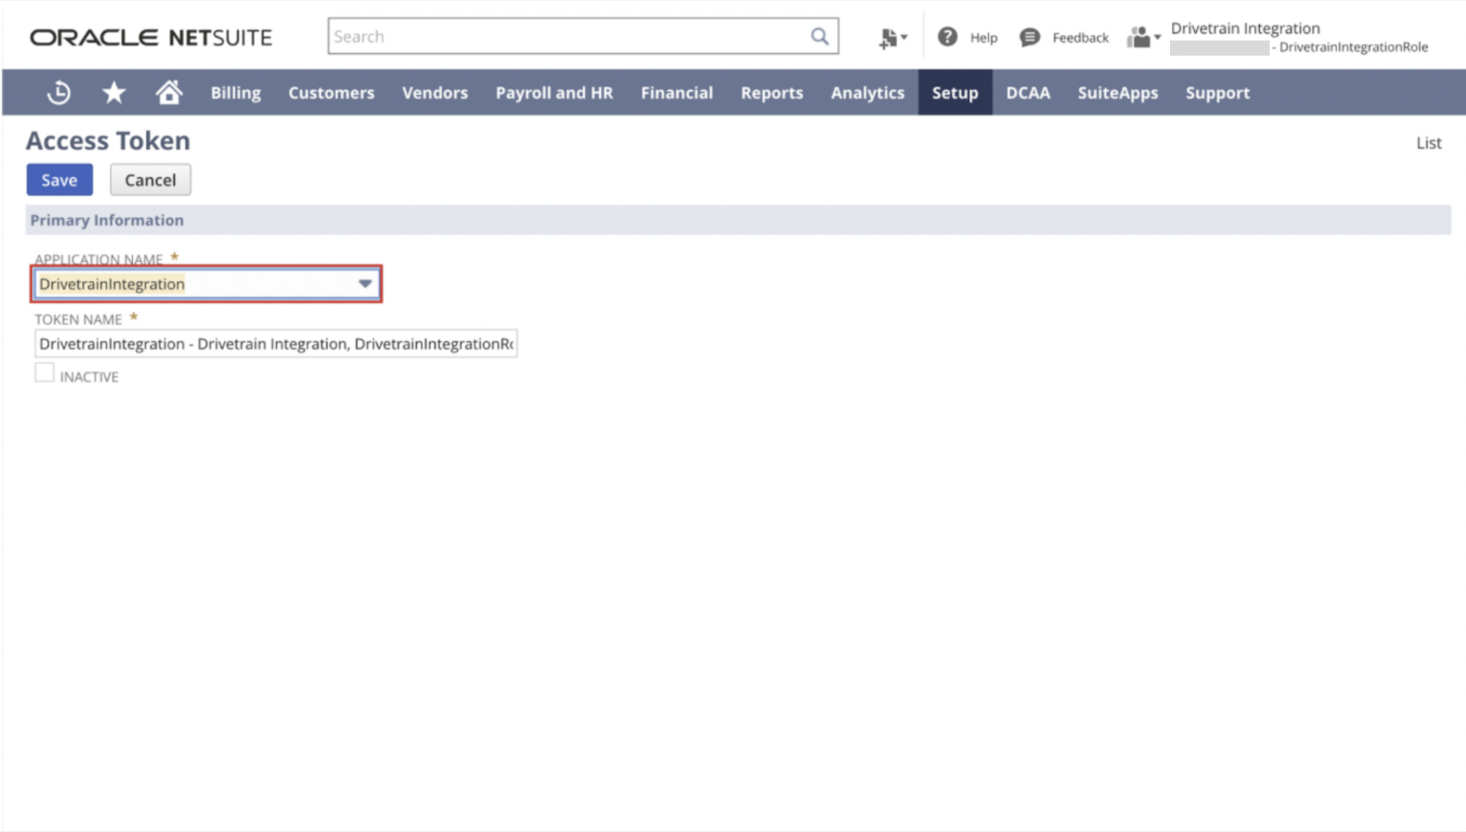
* Click **New My Access Token.**
* In the dropdown list for **APPLICATION NAME**, select the integration you created in Step 3.
Click **Save** and scroll down to the bottom of the page to get the:
* **Token Key**
* **Token Secret**
{% hint style="info" %}
Please make note of these items, as they will be required later.
{% endhint %}
#### **Step 6: Get Account ID**
* From the menu bar, navigate to **Setup** → **Company** → **Company** **Information.**

You will find the **Account ID** here. Please note it down.
{% hint style="info" %}
This completes your NetSuite setup. If you have any questions or run into any issues with this part of the integration process, please contact your customer success manager for assistance.
{% endhint %}
#### Step 7: Set up NetSuite Saved Search
1. Download the Script from and unzip it.
2. To install the script, navigate to **Customization** > **Scripting** > **Scripts** > **New**. You'll see the Upload Script File form.
3. Hover over the Script File field, and you'll see a "**+"** button appear to the right of the field. Click the button and the File upload form will appear.
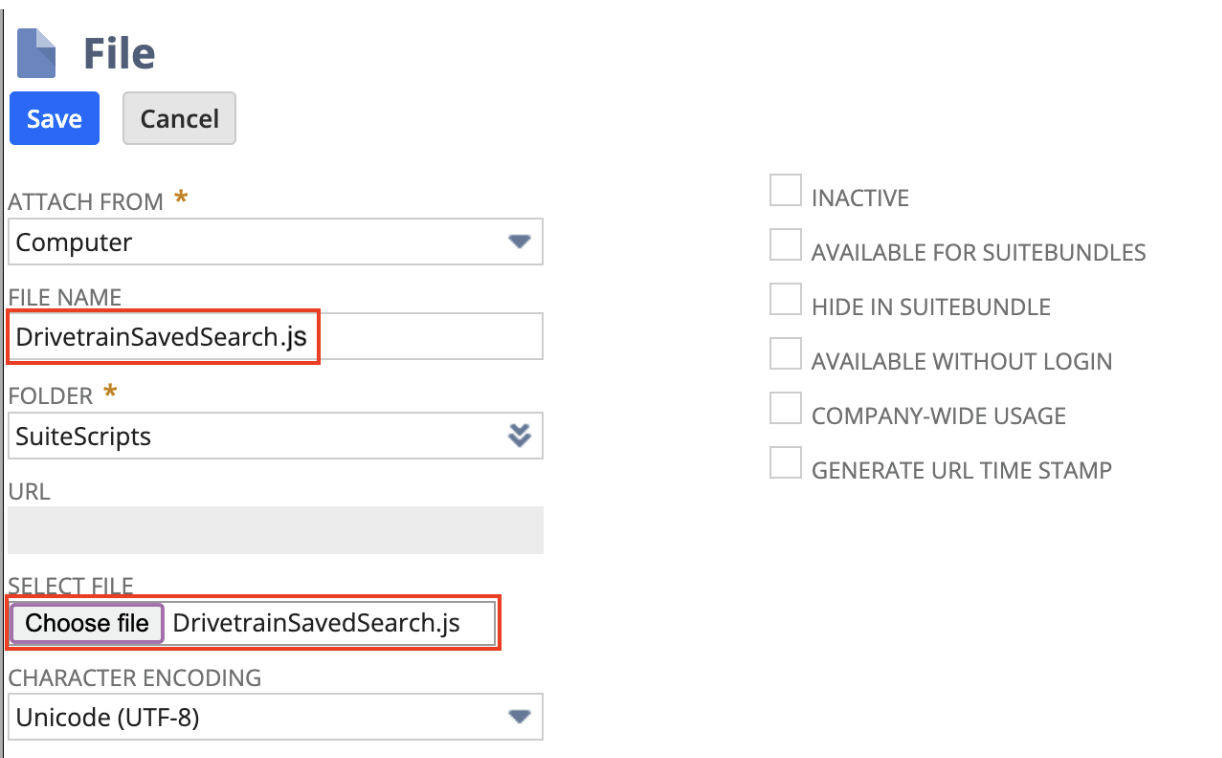
4. By default, the script will be uploaded to SuiteScripts folder in your File Cabinet (or to the last folder that you uploaded a script to). If you'd like to install the script in an alternative folder, select it from the Folder field.
5. Next, click the **Choose File** button in the Select File field. Then navigate to the folder that you unzipped the file to, and select the file.
6. Then click the **Save** button. The file will be uploaded, and then the Upload Script File form will reappear, with the Script File field loaded.
7. Upon save, the script file will be populated in the Upload Script File form and then click on **Create Script Record** button. The Script form will appear.
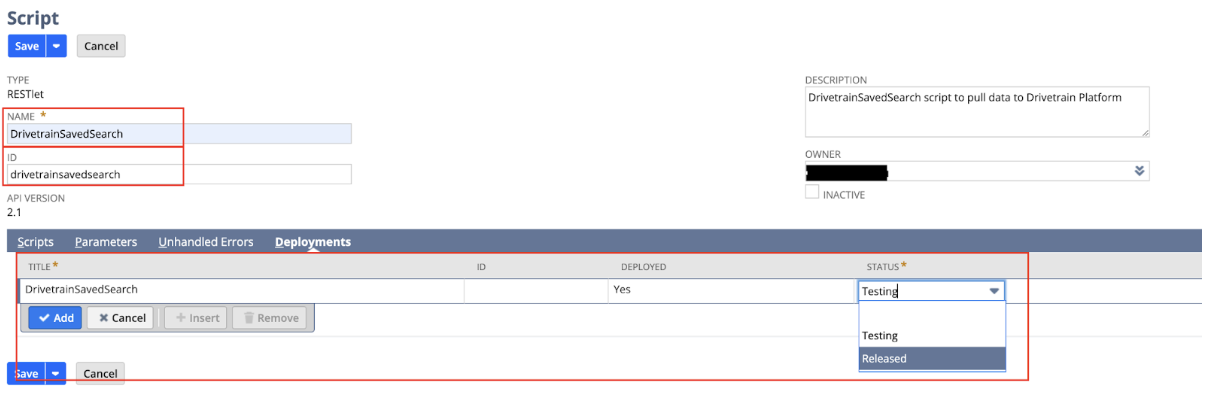
8. In the script form, enter **Name** and **ID** as follows. Click on the **Deployments** tab, and enter the Title as "DrivetrainSavedSearch**"**.
9. Mark the status as **Released**.
10. Click **Save** to finish the installation process.
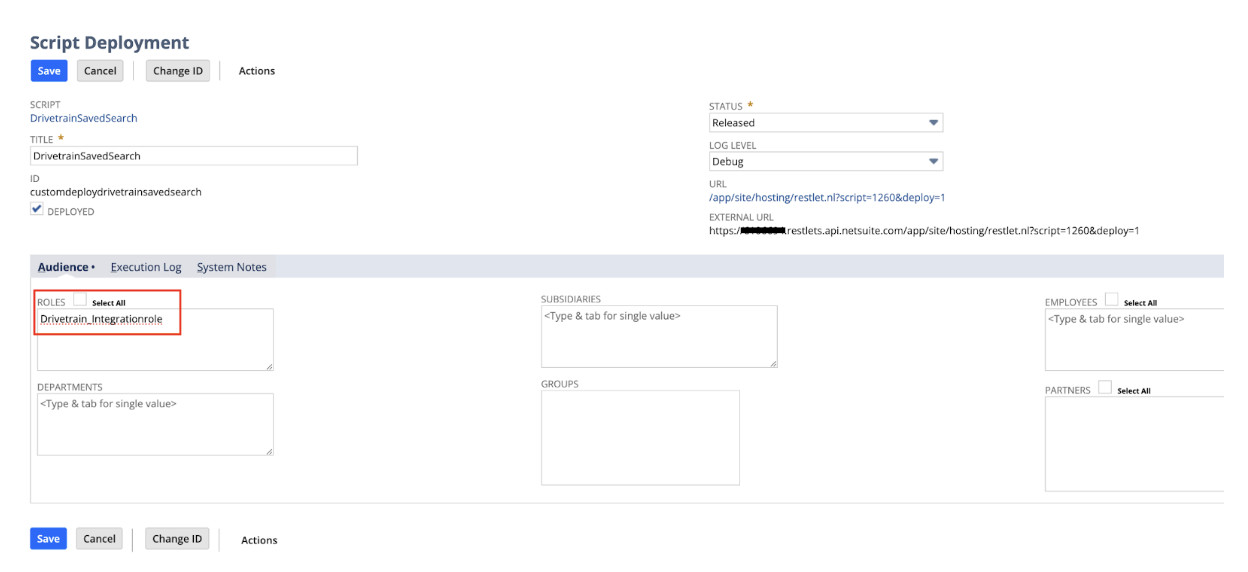
11. After saving, click on the Deployment title to view the Script Deployment Form.
12. Make a note of **External URL**.
13. Edit the Script Deployment and update the role for the script (which you created for Drivetrain Integration) and click on **Save**.
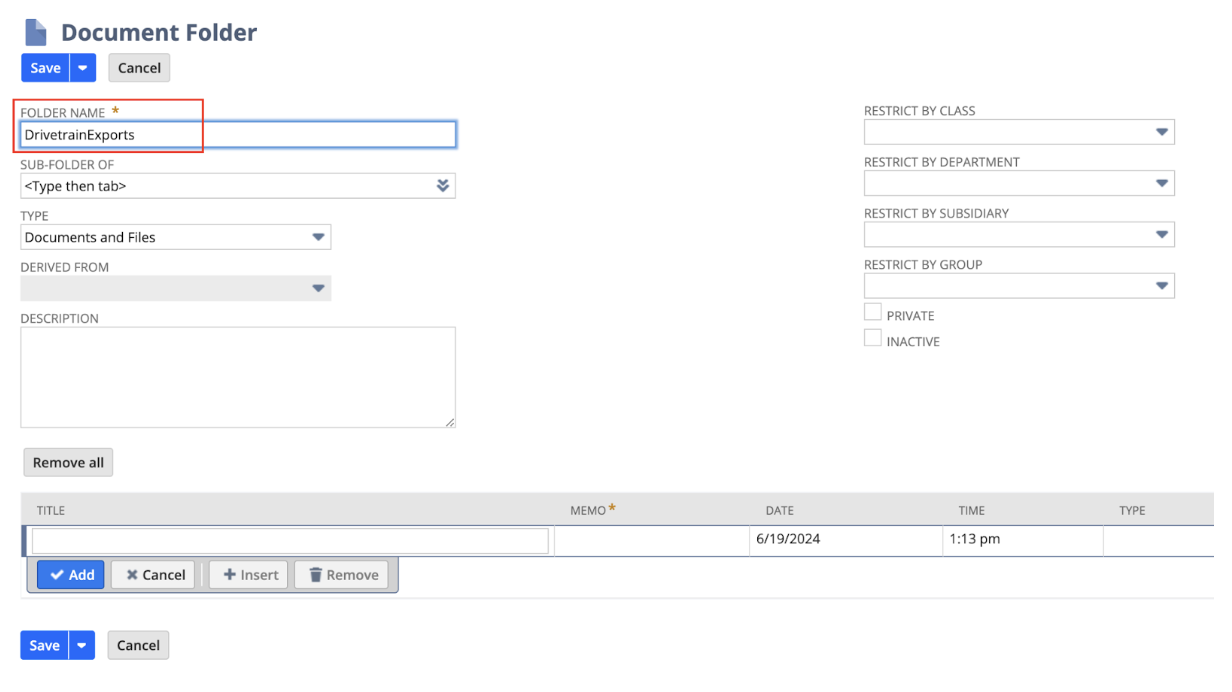
14. Go to **File Cabinet** and select **New** Folder.
15. Add a folder “DrivetrainExports” in the root of File Cabinet and click **Save**.
### Drivetrain Setup
#### Step 1: Navigating to the NetSuite Connector
* Sign in to your Drivetrain instance. Make sure you are logged in as an administrator.
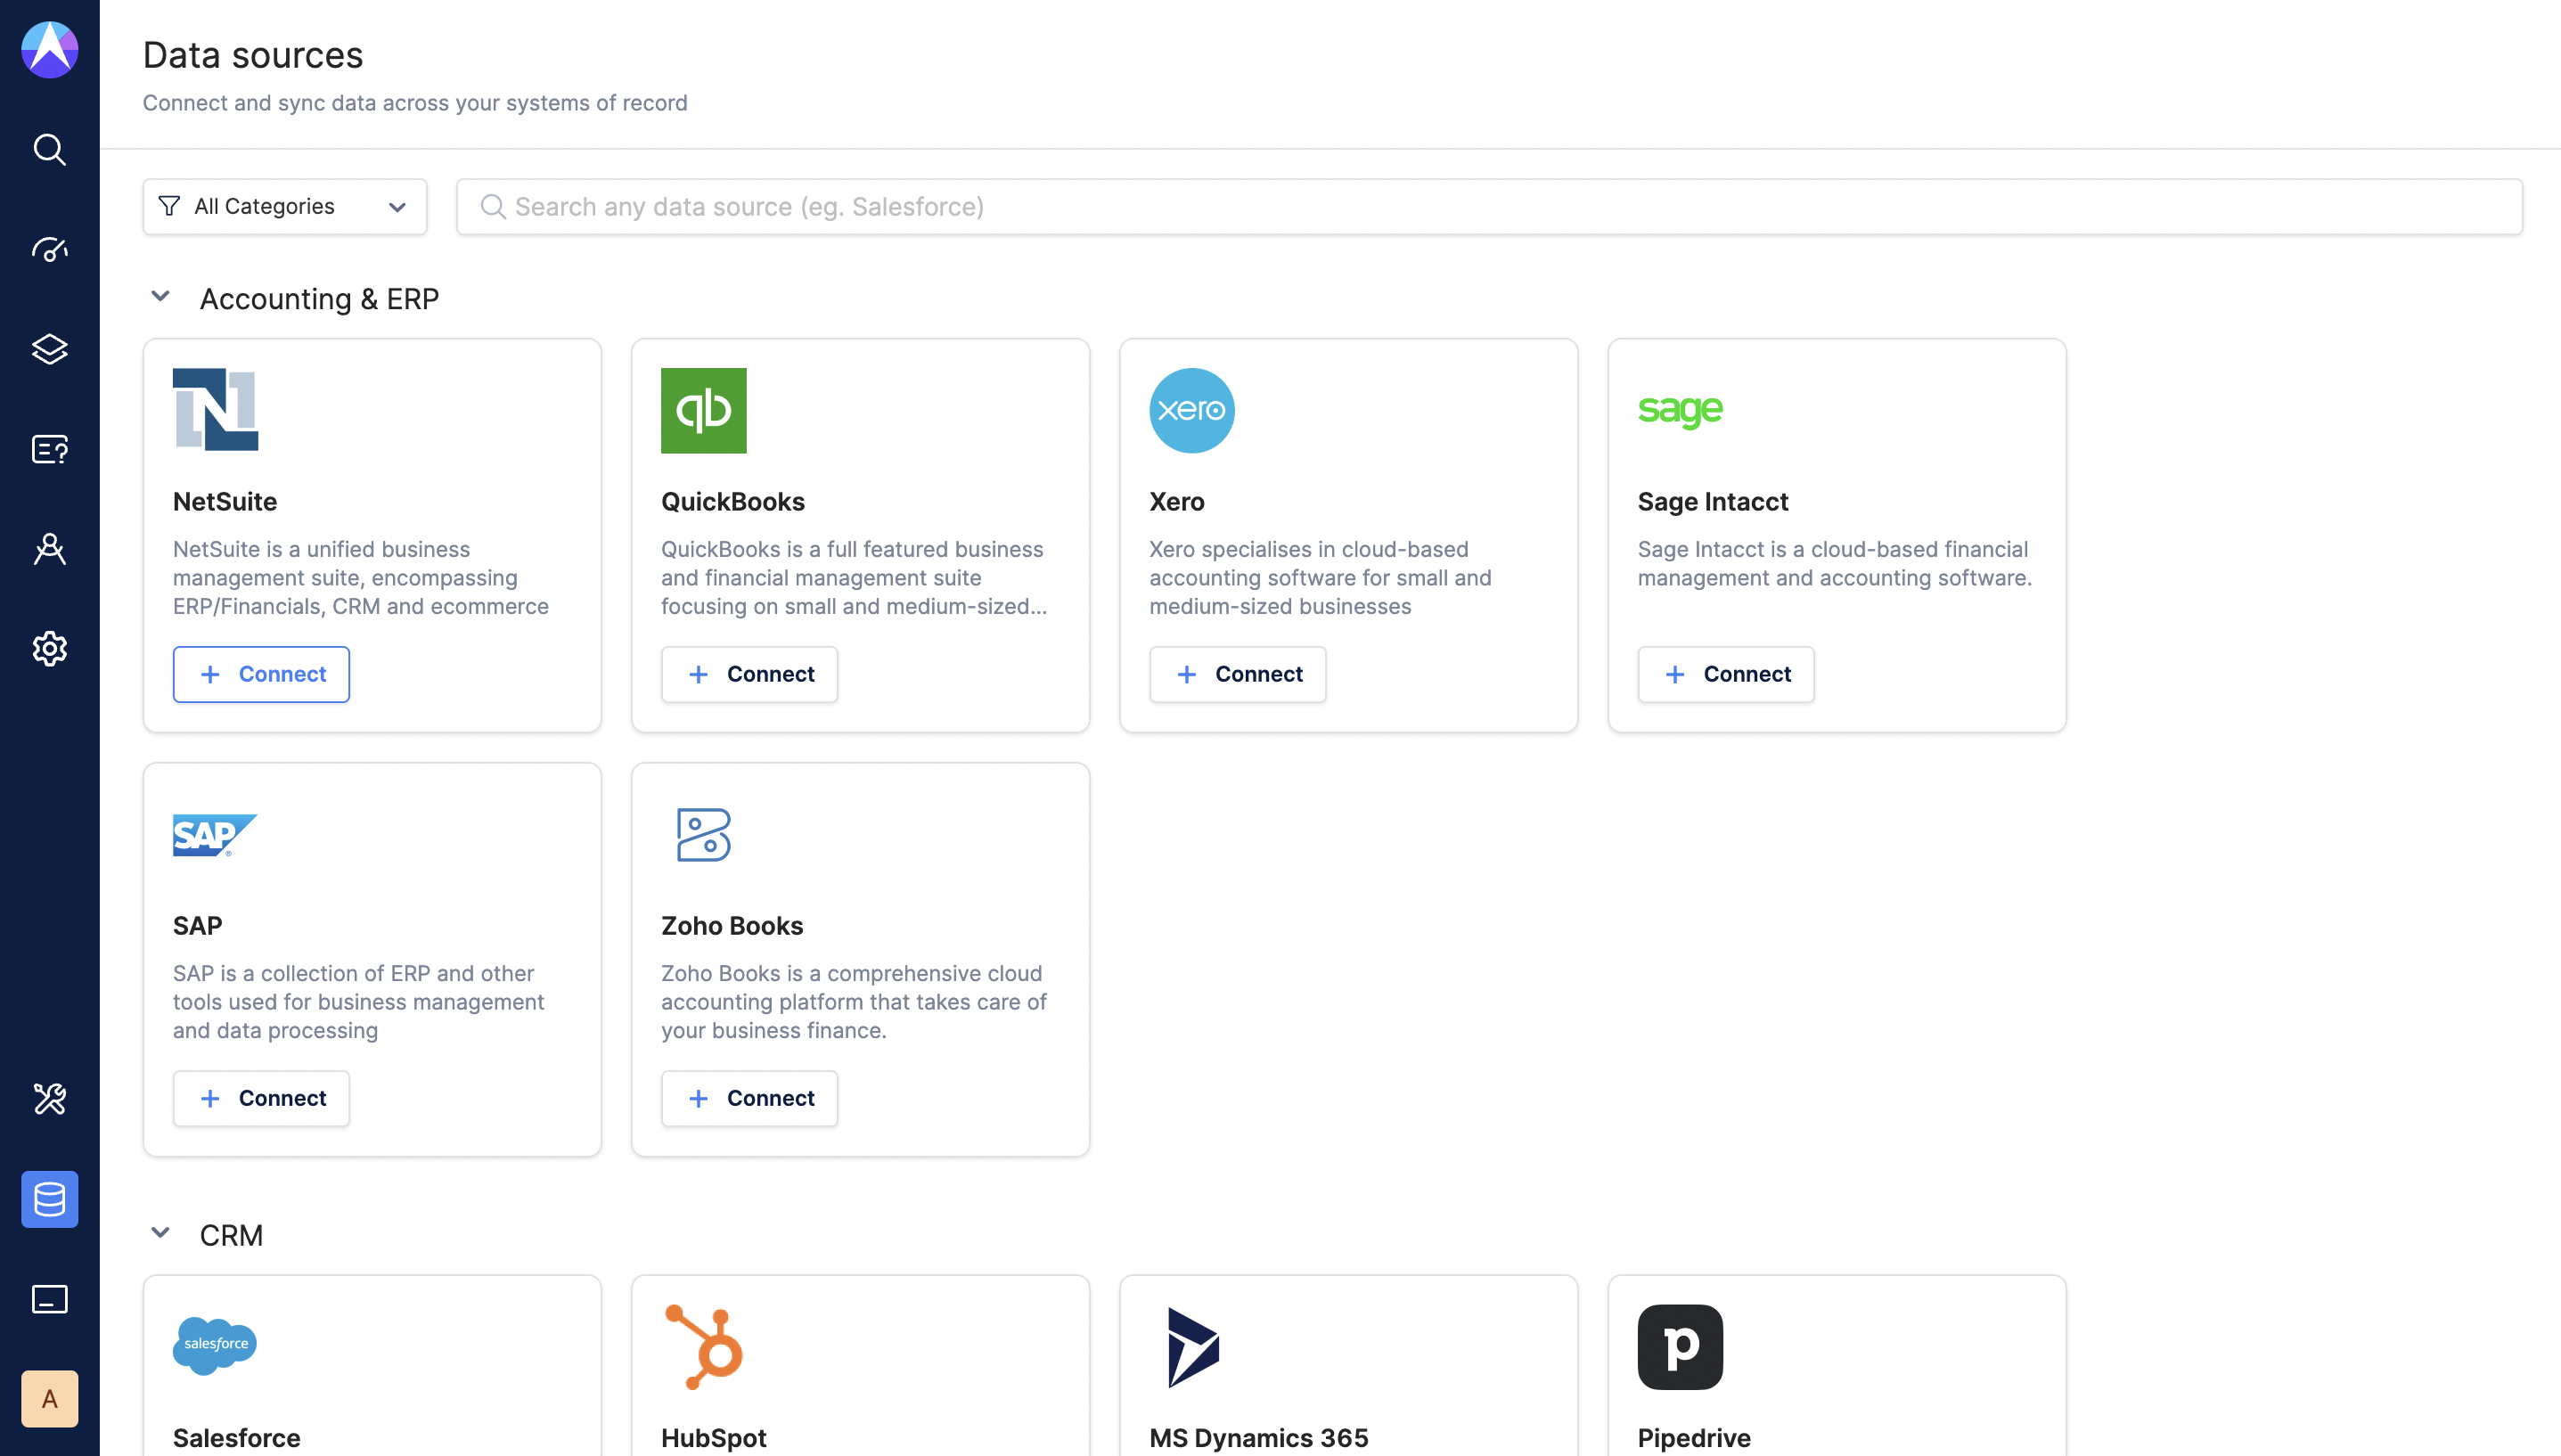
* Click on **+ New Data Source.**
* Select the NetSuite Data Connector from the list of integrations by clicking **+Connect.**
#### Step 2: Entering Credentials
* Enter the keys, secrets and account ID you generated when setting up your NetSuite account, and click **Submit.**
* **Consumer Secret**
* **Consumer Key**
* **Account ID**
* **Token Key**
* **Token Secret**
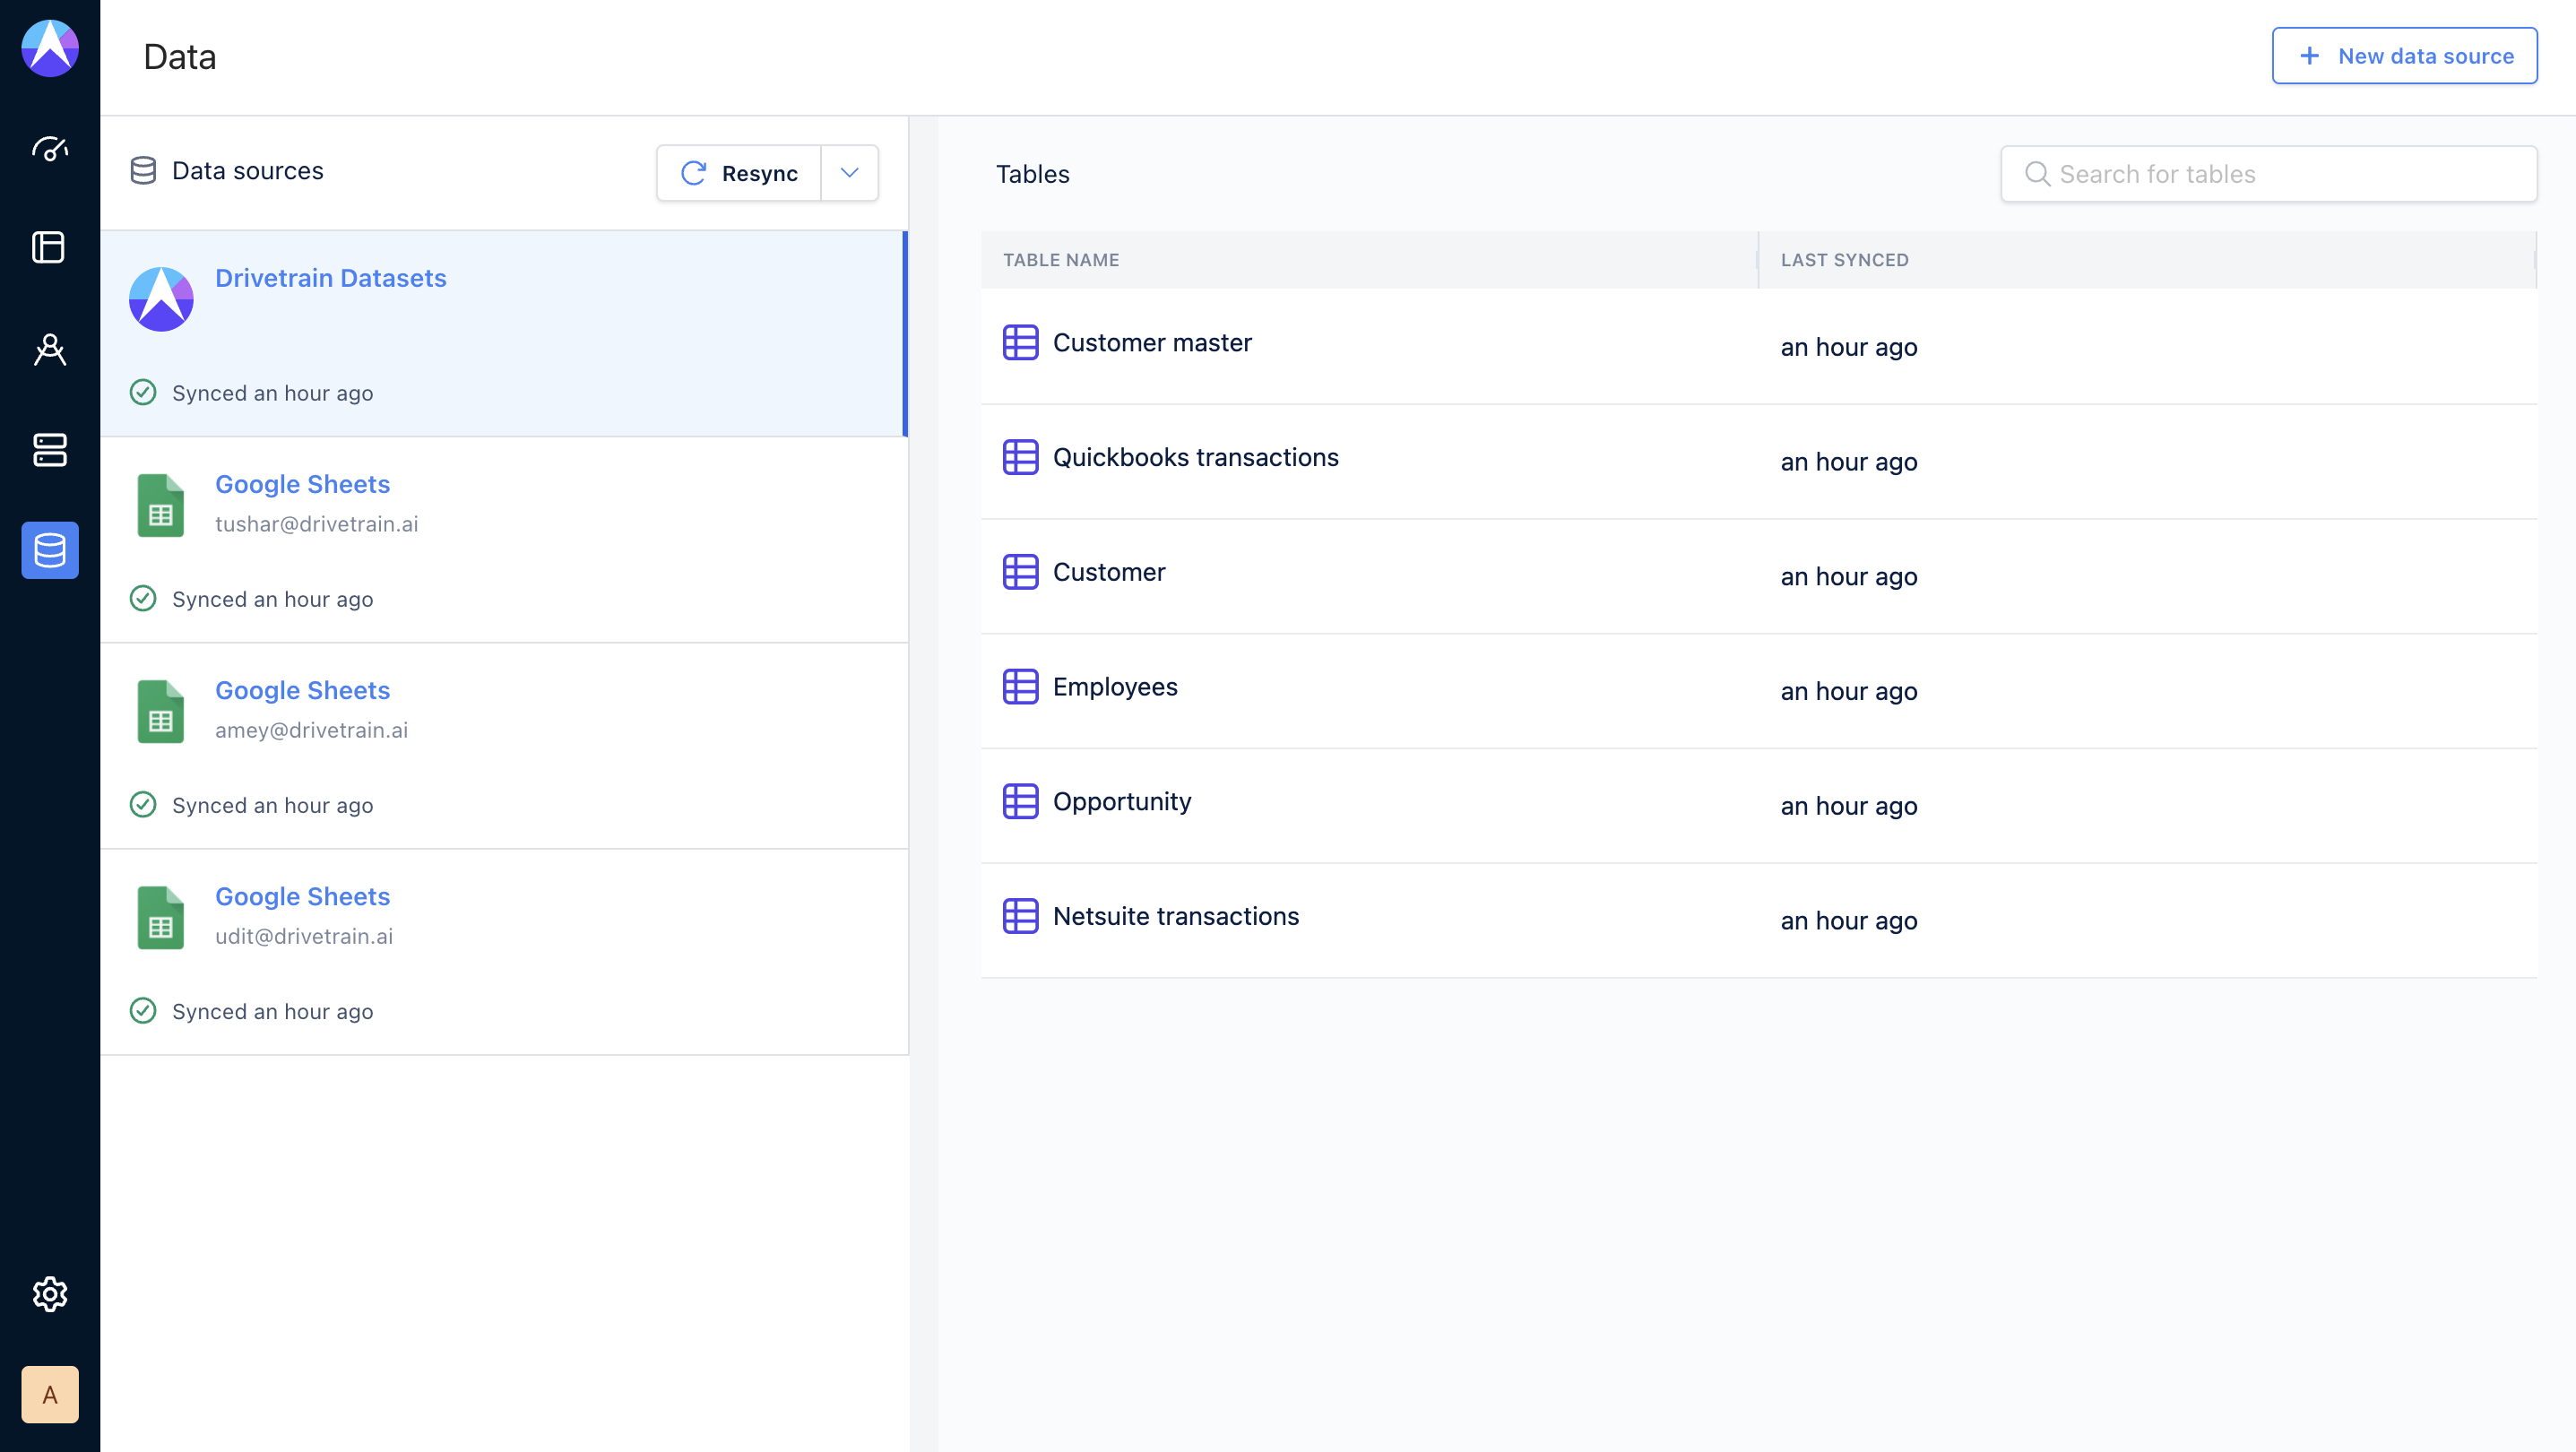
* You will be redirected to the **Connected Integrations** page where you will be able to see your new NetSuite connection. Once the sync is complete, you will be able to see your NetSuite data on Drivetrain!
---
# Agent Instructions
This documentation is published with GitBook. GitBook is the documentation platform designed so that both humans and AI agents can read, navigate, and reason over technical content effectively. Learn more at gitbook.com.
## Querying This Documentation
If you need additional information that is not directly available in this page, you can query the documentation dynamically by asking a question.
Perform an HTTP GET request on the current page URL with the `ask` query parameter, and the optional `goal` query parameter:
```
GET https://integrations.drivetrain.ai/integration-guide/integrate-with-drivetrain/others/integrating-with-netsuite-role-based-access.md?ask=&goal=
```
`ask` is the immediate question: it should be specific, self-contained, and written in natural language.
`goal` is optional and describes the broader end goal you are ultimately trying to accomplish on behalf of the user. GitBook uses it to tailor the answer towards what is most useful for that goal.
The response will contain a direct answer to the question and relevant excerpts and sources from the documentation.
Use this mechanism when the answer is not explicitly present in the current page, you need clarification or additional context, or you want to retrieve related documentation sections.